
Regal Banjo 'Mother of Toilet Seat' Refret

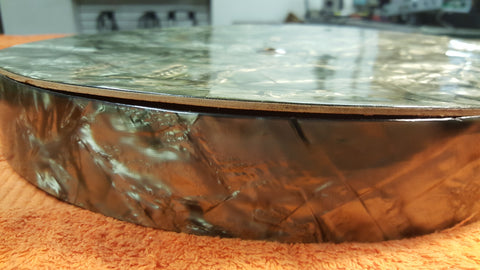
Over the years, the celluloid started shrinking. This instrument likely also spent a number of years in a hot dry attic, which caused the glue joint between the fingerboard and neck to creep and give way.


Eventually, the celluloid shrank so much that the fingerboard beneath it cupped, causing frets to work loose. In most instances such as this, frets are pulled, a rosewood or ebony fingerboard is planed flat, and then the frets are replaced. In this case, the celluloid will have to be removed as well.
The back of this instrument has also started to come apart. Same problem here, although the back reglue was far more straightforward, and didn't require the whole thing to be dismantled and pieced back together. I also fabricated a new bridge, and overhauled the setup on this instrument, but in this blog post, I'll focus primarily on the work I did to the neck and fingerboard.

I usually apply heat to each fret with a high wattage soldering gun, before pulling them loose with a pair of flush ground end nippers. The heat helps prevent the fingerboard from chipping and splintering as the frets are being pulled out. Celluloid dinitrate is extremely flammable, so I didn't heat these frets before pulling, and honestly, it wouldn't have been necessary to do so. The severely cupped fingerboard had worked most of the frets loose already, and the celluloid overlays would have supported the wood next to the fret slots enough to prevent chipping. These frets practically fell out; in fact, a few were already missing when the instrument came into the shop. This was by far the easiest time I've ever had pulling frets. Definitely not a sign of things to come though.

Next up, the binding is removed. I work slowly with an xacto knife to loosen the binding, starting at the heel, and working my way up to the nut. The binding is very brittle and fragile, but it popped loose from the fingerboard easily without being damaged in the process.

When this neck was made, the celluloid was likely glued to the board in one piece, and the excess was trimmed flush. The fingerboard would have been slotted afterwards. You can see in the above photo, there's some continuation to the pattern in the fingerboard from piece to piece. After pulling both binding strips, I took a second to clean most of the finger gunk off of the celluloid before removing it.


The celluloid overlay pieces are about .020” thick, but not nearly as brittle or fragile as the binding. I use a chisel tipped hobby knife and a painters palate knife to work each piece loose, starting from a corner.


Here's a shot of the fingerboard, removed, but still sitting in place. This photo gives you an idea of how badly warped the thing was. A thin piece of veneer was sandwiched between the board and the neck, and that's visible in the photo above as well. The piece of veneer came apart during the fingerboard removal, and I elected not to replace it. Next, I'll use vinegar to loosen and remove the remaining glue residue and tape that was used to mount the celluloid.

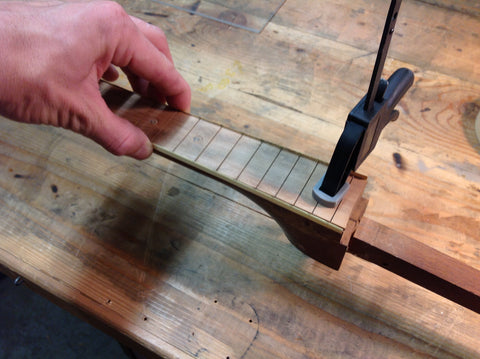
In this photo, I've heated up the fingerboard and clamped it flat to my bench, underneath a fingerboard leveling beam, in an effort to flatten it out most of the way.

Here are a few more shots of the fingerboard, part way cleaned and prepped for install, along with the celluloid and binding strips.


After the board is cleaned, I check the depth of each fret slot with a handy little tool made from a piece of scrap fretwire with the barbs filled off of the tang. If I'm not able to seat this piece of wire, I'll clean and deepen the fret slot with my fretting saw.


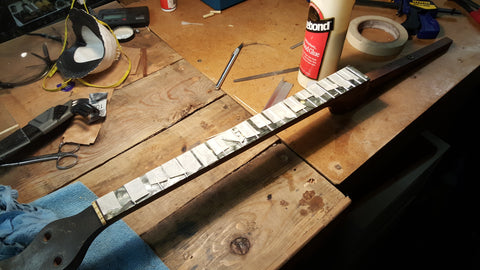
Now, it's time for the monumental task of gluing each piece of celluloid back on. To keep the overlays perfectly aligned, I clamped the binding strips in place temporarily to limit side to side movement. I also used a few pieces of fretwire with the barbs filed off of the fret tangs to sit in the fret slots on either side of the piece being glued, to keep them firmly in place. I made a cork padded caul to cradle the underside of the neck, to prevent the clamp from marring it up, and I used a second caul to press each celluloid piece firmly flat against the fingerboard. For each piece, I shortened the caul to fit between the fret slots. After about fifteen minutes or so of being glued and clamped, I'd remove the binding strips and fret wire bits, and after another half hour, I'd remove the clamps, and glue up the next piece.


Here, I'm filing the fret ends flush, to allow for the binding to be reinstalled. I'll bevel and dress the fret ends later.

The binding channels are prepped by carefully chiseling glue residue, both old and new, off of the edges of the fingerboard. The binding strips are prepped in the same manner. The binding is incredibly fragile, and despite my best efforts, I ended up breaking a piece in half while scraping it clean. A seamless fix is possible, however. In the above photo, I've got one half of binding glued and taped. I have a jar of 'binding glue' that I made out of scrap bits of ivoroid binding that I dissolved in acetone. I'll put a small dab of this special glue between the gap where the binding broke, and it'll melt neatly back together. Super gluing the pieces of binding back together would be structurally sufficient, but it would leave an unsightly black glue line. This method fuses the two pieces of plastic back together, and is very difficult to detect. Each strip of binding is glued in its channel with titebond, and held in place with masking tape. Masking tape has a certain amount of elasticity to it; if you lightly stretch each piece before sticking it down, it will actually pull the binding strip tight into the slot.


Finally, the frets are dressed. I bevel the fret ends neatly, and any high frets are carefully leveled and crowned. This is far more tedious on a plastic fingerboard; if I slipped with a fret file and marred the celluloid, it wouldn't be as easy to fix as it would be on a rosewood or ebony board. I then go through again and remove any leftover glue residue with vinegar.
Lastly, the neck is reattached to the body, the (now fixed) back is attached, and the banjo is strung up with nickel wound strings and set up.

Project Complete!